
Brisbane Thatch & Decks
"Bali Huts"

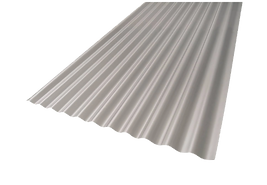
Color-Bond Gazebo DIY Kits
Frame Install Instructions.
Step 1 Ring-beam
All timbers must be placed and joined with the markings facing up.
Begin by laying the 4 ring beam pieces on a flat area at the location where your Bali Hut is going (these are the widest timbers numbers 1 on the plans).
Make sure the ring beams are flat and square, then attach them together using 5 Batten screws.
Make sure it is square by measuring from corner to corner (the diagonal measurements should both be the same).
.png)
Step 2.a For installations on concrete slabs.
Mark the position of the post on the slab / floor area. Move the frame away. Fit the steel brackets in the post. Put the post on the markers on the concrete slab. Mark the position of the steel brackets on the ground. Remove the steel brackets from the post. Now move the steel brackets back to the marked position. Drill the holes for the draw-bolts. Insert the draw-bolts and fit the steel brackets. Fit the post on the brackets again.
Mark the bottom of the ring beam on all the post.
2150 to 2250 above floor level.
.png)
Step 2.b For In ground Installations.
So if the posts is 150mm diameter mark your center of hole 75mm in from each corner where the ring beams join. Move your ring beam assembly out of the way and dig the four holes 800mm to 900mm deep with diameter of 450mm.
Once this is done move your ring beam assembly back into place and make sure it is still square and flat.
Next place your posts into the holes you have just dug making sure that both corners of the ring beams are touching the post and are vertical, then set with concrete.
Mark the bottom of the ring beam on all the post.
2150 - 2250mm Above floor level.

Step 3
After the post are in and the concrete has set you need to trim the top of the post.
Marked the height on the posts that you want the bottom of the ring beam to be installed at. Normally 2150 - 2250mm. Then you need to work out how much to ad to the post before you trim the tops of the posts.
Measure the end of the hips. Subtract that measurement from the with of the ring-beam. eg. If the bottom of the hip is 100mm and the ring-beam is 300mm. 300-100=200mm. So we need to ad 200mm to the mark on our post and then trim the post.
On the small roofs the parameter beam can just be slide up on the outside of the post to the correct height. Attach the ring-beam with 4 ea 100mm batten screws to each end.
On the bigger frames however it is advisable to take the parameter beam apart and install the ring-beam one beam at a time. Use 5ea 100mm batten screws on each end...
.png)
Step 4
The Knee braces on freestanding Gazebos (not needed if the posts are being concreted into the ground) screw up on the outside of the ring beam, and the outside of the post. Lay the knee brace at 45° across the corner between the post and the ring beam (knee brace sits on the outside of the post and butts up to the underside of the ring beam). Use 1 x 100mm batten screw to attach the knee brace into the ring beam and 1 x 100mm batten screw to attach it to the post, ensuring the post is perpendicular to the ring beam.
.png)
Step 5
When King post is mentioned here substitute it for ridge beam if you have a rectangular kit. Nr 2 on the plans.
Assemble the hips as follows Nr 3 on plan.
The hips are the double pieces screwed together with point one end and inverse on the other.
Place the pointed end snugly into the upper corner of the ring beam with the line marked side facing up. Ensure top of the hip sides are level with the top of the ring beam hold hip in position while attaching with 2 X 100mm batten screws, screwed through both sides of the ring beam into hip.
The hip will then hold itself in position, repeat for all hips, do not worry if they don’t appear to all line up exactly at this time.

Step 6
Insert the King post (square 100mm block Nr 2 on the plans) or ridge beam (the large beam made of 2 pieces screwed together with an extension piece of timber on the top) into the center of the 4 hips.
The king post should protrude down about 25mm below the hips, or for ridge beam, the hips should sit 50mm down from the top of the ridge beam main timbers (not the extension timber).
You can then adjust the hips by pushing them up and down until they are all level on the king post / ridge beam. If you end up with 2 diagonally higher than the other 2 your frame is out of square and you need to move the ring beam and posts slightly to adjust them all level
Once they are all lined up screw together with 100mm batten screws.
.png)
Step 7 Rafters
Starting with the longest rafters Nr 4 on the plan (line marked side faces up) place the lower end against the inside of the ring beam and the top against the hips/ridge beam, pencil lines on the ring beam give an approximate location, check and adjust where necessary using a set square so the rafters are at 90 degrees to the ring beam, the top outer edge of the rafter should be flush with the top of the ring beam.
Screw together using 2ea 100mm batten screws through ring beam and one 100mm batten screw through top of rafter into hip or ridge beam. Nr 4 on the plan.
Always start with the longest rafters working to the shortest creepers.
With an A frame roof the rafters are all the same length so do the ends first then after all the rafters are in place attach the brace across the rafters
Now fit all the smaller rafters. Nr 5 on the plan. 2ea 100mm Battens screws at the bottom and 2 ea 75mm Batten screws at the top. The smaller frames will only have one 75mm Battens screw at the top.

Step 8 Braces
Braces are only installed if supplied for roofs with a long ridge beam.
.png)
Step 9 Battens
Fit the Battens/ Purlins on the frame with 1x100mm batten screw on each crossing. See Plan.
Step 10 Roof Sheeting
One method is to spread the color bond sheets on a flat service. Measure the roof and mark the sheets where it need to be cut. Note that the off cuts will fit on the next side of the roof.
.png)
.png)
Step 11 Fit the color bond sheets.
Please note the position of the Type 17 roof screws holding the color bond sheets in position.
Mark the position of the battens on the sheets so the screw lines is in a strait line. Also when you attach the hip flashing you will know where the battens is so that the screws does not show from beneath.
Step 12 Hips
When you attach the hip flashing, use lines on the roof so that the screws does not show from beneath. Trim the flashing at the top and the bottom of the roof to fit the profile of the roof.
Step 13 Fit Gutters if so desired.
.png)

Any problems please call us, we are more than happy to talk you through it.
Brisbane Thatch And Decks 041 721 9090
